3D Printed Design Concepts: Part Four (Renders and Cumulative Post)
Files:
(Sketches, first models, and slicer previews at end with renders)
Final (Process and Renders):
Renders:
Piece adjustments:
Adjusting the size of the pyramid. Starting by making the base roughly the same size as the other base sizes.

Also adjusting the thickness of the pole so that it will be able to print.

Here they are all together, the sizes are definitely more consistent and closer to what I wanted.

Size measurements.

Reprint:
The base is closer in size to the others and the flag pole is much thicker (no supports show up when I put supports on.


Just had to wait a few minutes and then there were some for me to book. But I only needed a single slot anyway. So it wasn't too bad.
Aaannnnddd...the pole didn't print.
Guess I'm resorting to toothpicks.

Painting:
So, here is my solution to the pole problem. I used the border that the printer makes and twisted it into a pole with a tail - the tail is so I could more easily adhere it to the pyramid.


Board set up:
I wanted the board to kind of look like the setup for the maps in the New Super Mario Bros Wii game. Having those paths to the levels (red dots).


I based the size of my board off of the normal chessboard dimensions - Decided which size by checking the widest part of my pieces.

(Widest part - jungle tree (bishop) canopy).


16" x 16" with a 20mm depth

I wanted the sides to be rounded, so I made some circles that I would loft together to make that rounded side.

Aaaaannndd...Rhino crashed

Here we go again.

At first, the corners were flat and not rounded like I wanted.

So I made another circle in the middle of that gap to make the curve.

And boom...round.

Then I mapped out the squares. To do this, I made them one mm taller than the board.

Changed up the colours...but I didn't like them being completely square.

So I changed it to circles and rounded squares.

I made the board the paths, the squares the grass patches and the circles the level selects.

Then I start placing the pieces.

The back row is placed.

Then I put in the pawns.

Changed the one side to green.

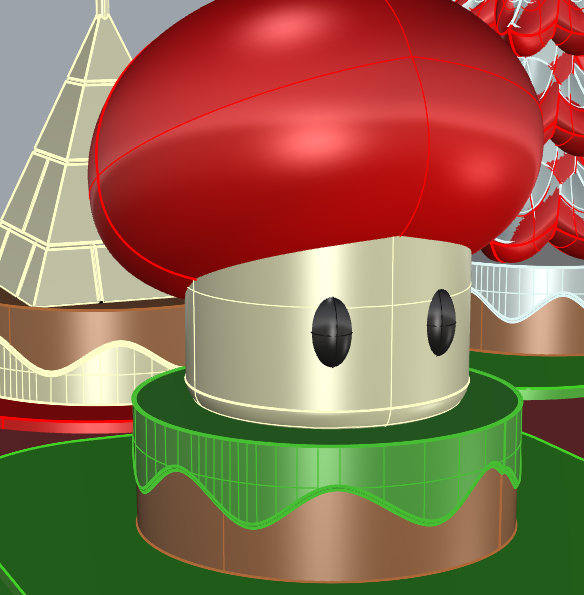
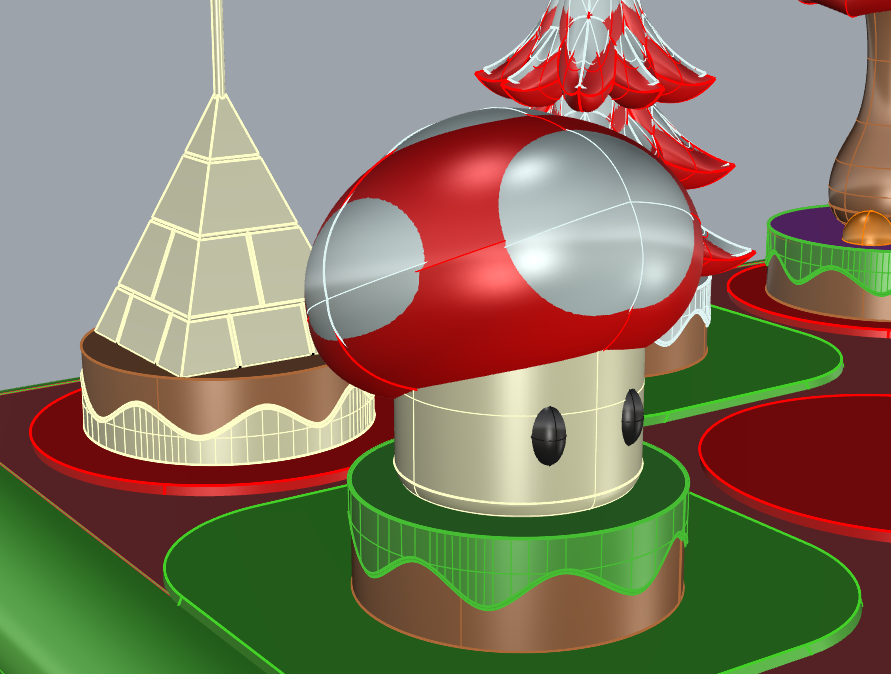
Adding details to the pawns/mushrooms.

Mini render

The Before:
Sketches:
I followed my sketches (on the right) pretty closely with the exception of the king. I left it as a normal tower and didn't add in any Bowser details.

First Models:
As stated previously, I made them in the wrong order, switching them to the world order corresponding to the height, so on the chess board they will be in the correct order.

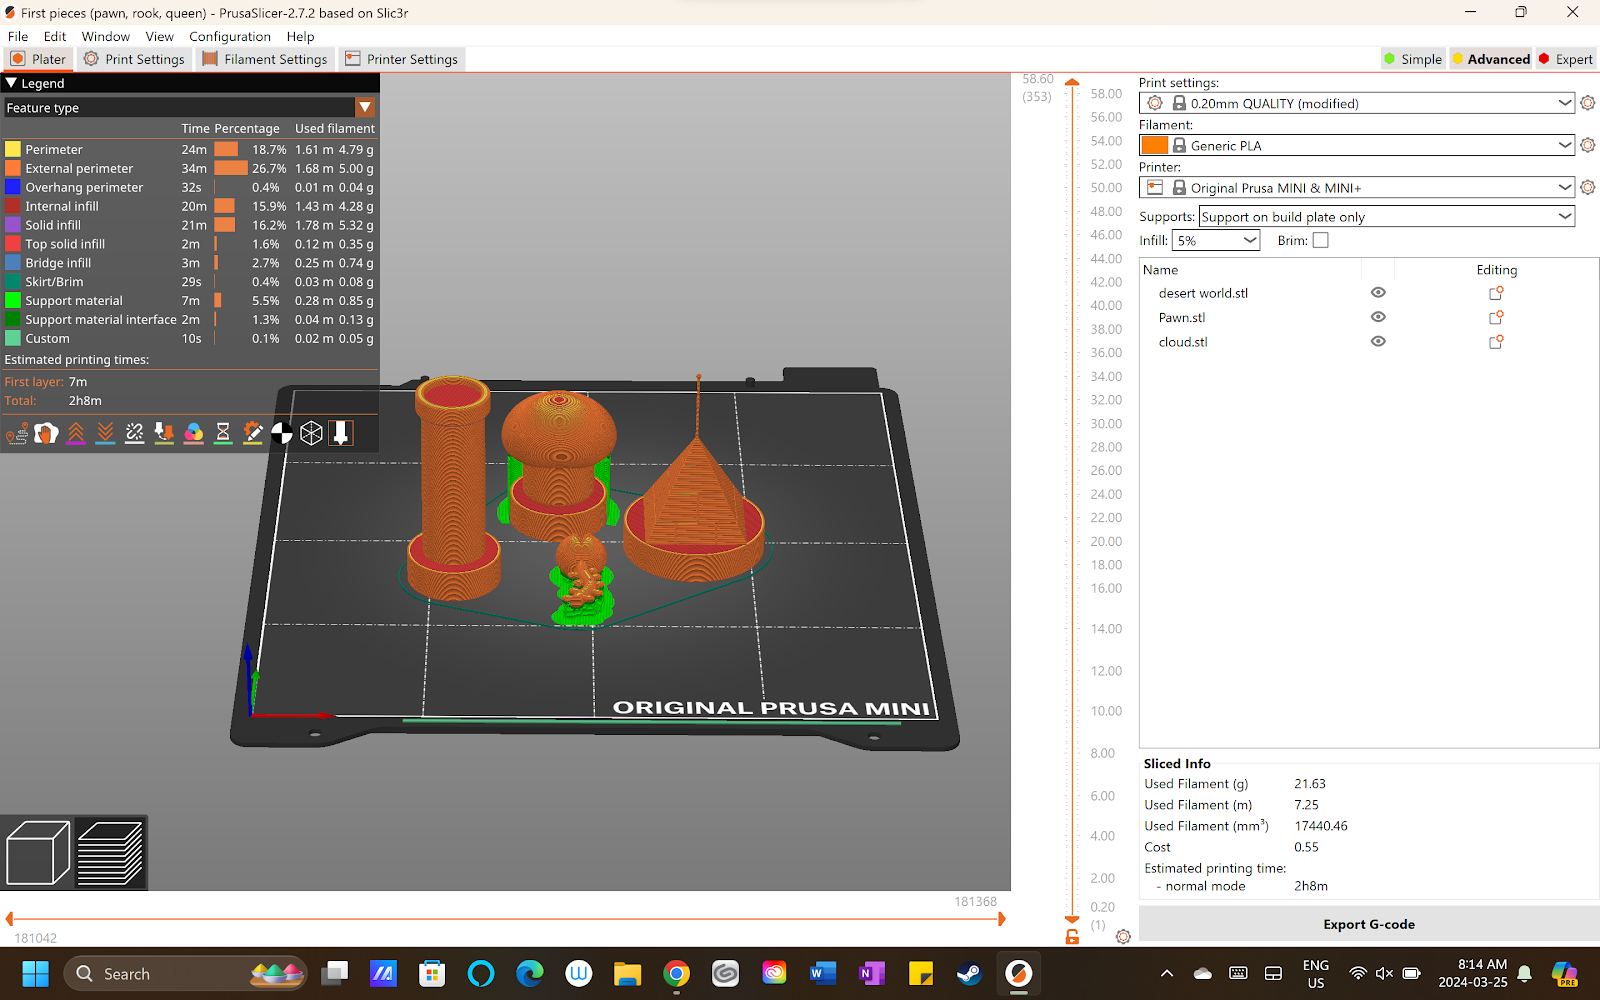
Slicer Layouts:
Two screenshots of my slicer files before printing.

Printed (non-painted) versions before reprint:
This photo has the old pyramid that was modelled and printed too big. I had already started painting and forgot to take a photo with the new one.

Renders and Final Painted Versions:
So...I don't have a chessboard...so, I decided to make all of my renders the chess set up and all my photos of the actual models the single shots. I also did my axo drawing, I tried to make it like those sheets you would get in a board game that shows you all the pieces and information.


(all pieces are painted in the red side's colours)
Starting with the king - Bowser's castle. I really liked how the brick texture turned out.
Queen - Cloud World. Easy paint. I switched the base colours (blue is on the bottom) from what they were in my renders.
Bishop - Jungle World. It was actually kind of fun to paint the purple top (poison) and have the green grass on the sides. The wiggler (the orange dots) was also quite a nice detail to paint.
Knight - Snow World. I decided to do some dry painting to blend out the snow on the tree which I think is a fun detail.
Rook - Desert World. The pole, I will admit, is very janky but with all the problems I was having printing the pole, I am proud that I found a solution. The flag was also fun to attach.
Pawn - Mushroom Kingdom. What can I say...it's beautiful. I was able to get it accurate to the normal design. I love it so much.


Comments
Post a Comment