3D Printed Design Concepts: Part Three (Prints and Some Render prep)
Files:
Progress:
Render Prep:
Snow World/Knight Adjustment:
Adjusted the placement of the two overlapping layers that I used to colour the pine tree to make it more accurate to the world selection.


Cloud World/Queen Adjustment:
Added in more leaves and their placement.

Printing Prep (1):
First, I measured everything out, just to see how big they ended up.


But I decided that those were a little too big for what I wanted. So I scaled them to better sizes. Making them somewhat proportional to actual chess pieces (based on the reference from my other blog post).


The two sizes side by side.

Then it was a matter of taking things apart so that I could print them.
Starting with the jungle tree, or the bishop.
To make sure the two pieces of the trunk and the leaves would fit together when printing, I first boolean unioned them together.


Then I exploded the piece and took them apart.


and the resulting parts fit together perfectly.

So it was just a matter of closing the surfaces to make them closed poly-surfaced objects for printing.

But when it came to the leaves, when I was attaching the patch to the rest of it...

The geometry would do this weird thing...


(non closed version for reference).

But Prusa Slicer seemed to read the object just fine...
So I left it and moved on to the next part.
These wrapped parts didn't like being boolean unioned to the rest of the piece. Which is fine, since they were mostly for the renders anyway and I had planned to paint them (if I have time to paint them) anyway.


All objects in gray are closed poly-surfaced objects. Anything in colour isn't.


For the pine tree, I added in this other inner cylinder for the tree's trunk but mostly to fill in those gaps, since the tree isn't flush with the base.

All done.

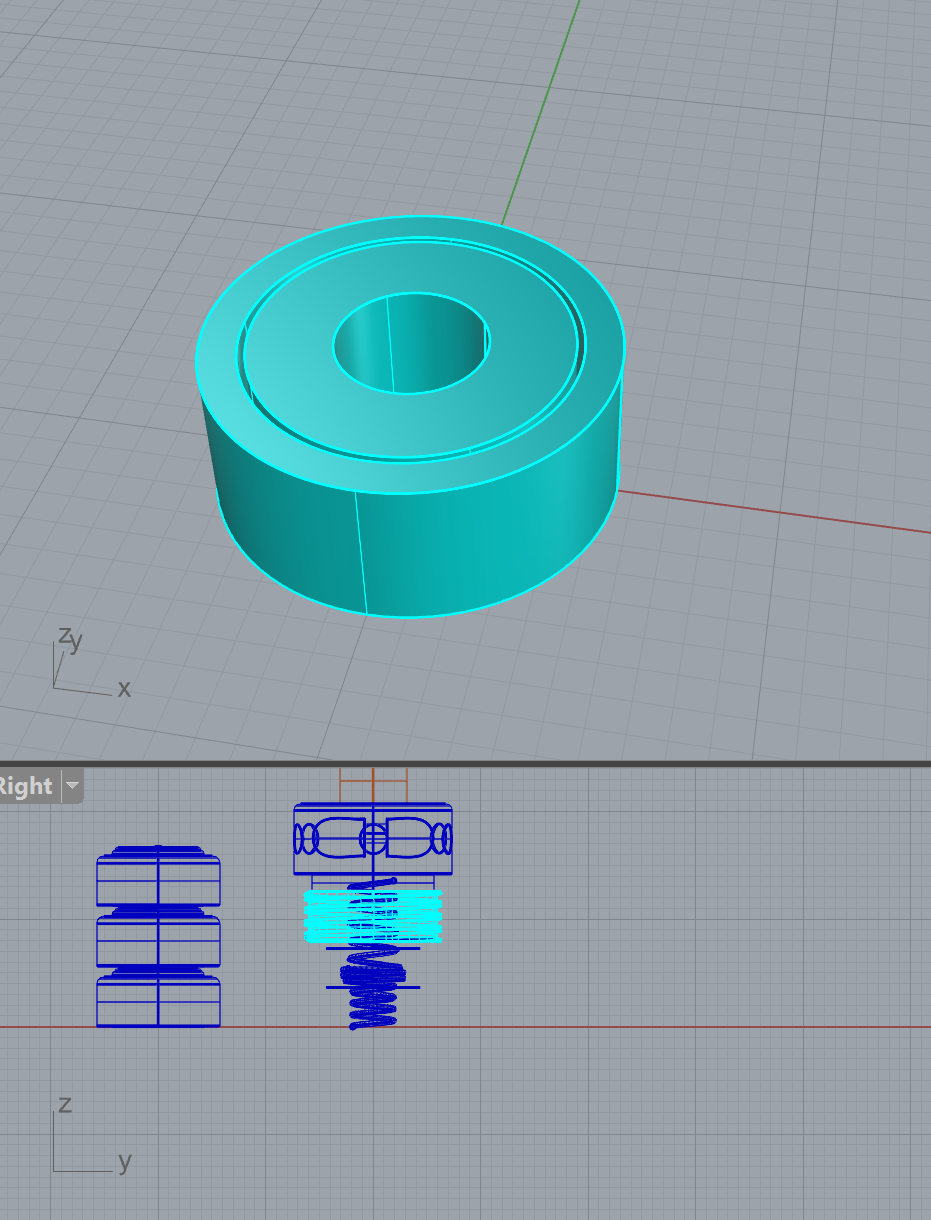
I knew the queen would be hard to print in this orientation, and I didn't want to just print the whole thing sideways, since the pipe is more conducive to being printed vertically. I started by boolean unioning them together and separating the plant from the pipe.

This left me with these holes, but unlike the jungle tree...this is all flat, so it didn't make sense to keep them. So, I just replaced that inner part of the pipe to get rid of the holes.


Then I patched the bottom of the plant.

All ready for printing.

The king was tricky... I knew this print was going to be hard and that it would be a good idea to avoid supports where I could.
First, boolean union as always.

And separate the parts.

Then patch the holes so that I have the exact spots where the spikes should be attached, and the spikes will perfectly mould to the piece.


From there, I basically had to boolean union the rest of the piece to make it that closed poly-surface for printing.

I decided to keep the brick texture for the king. I had to adjust the bricks and make sure I could boolean union them to the main part of the piece.

Printing Prep (2):
Print 1:
The rook is definitely wider than I want it to be, and the pole is really spindly, as I broke it. Even if it printed fine...everything else is good though. The details in the pyramid printed quite well.

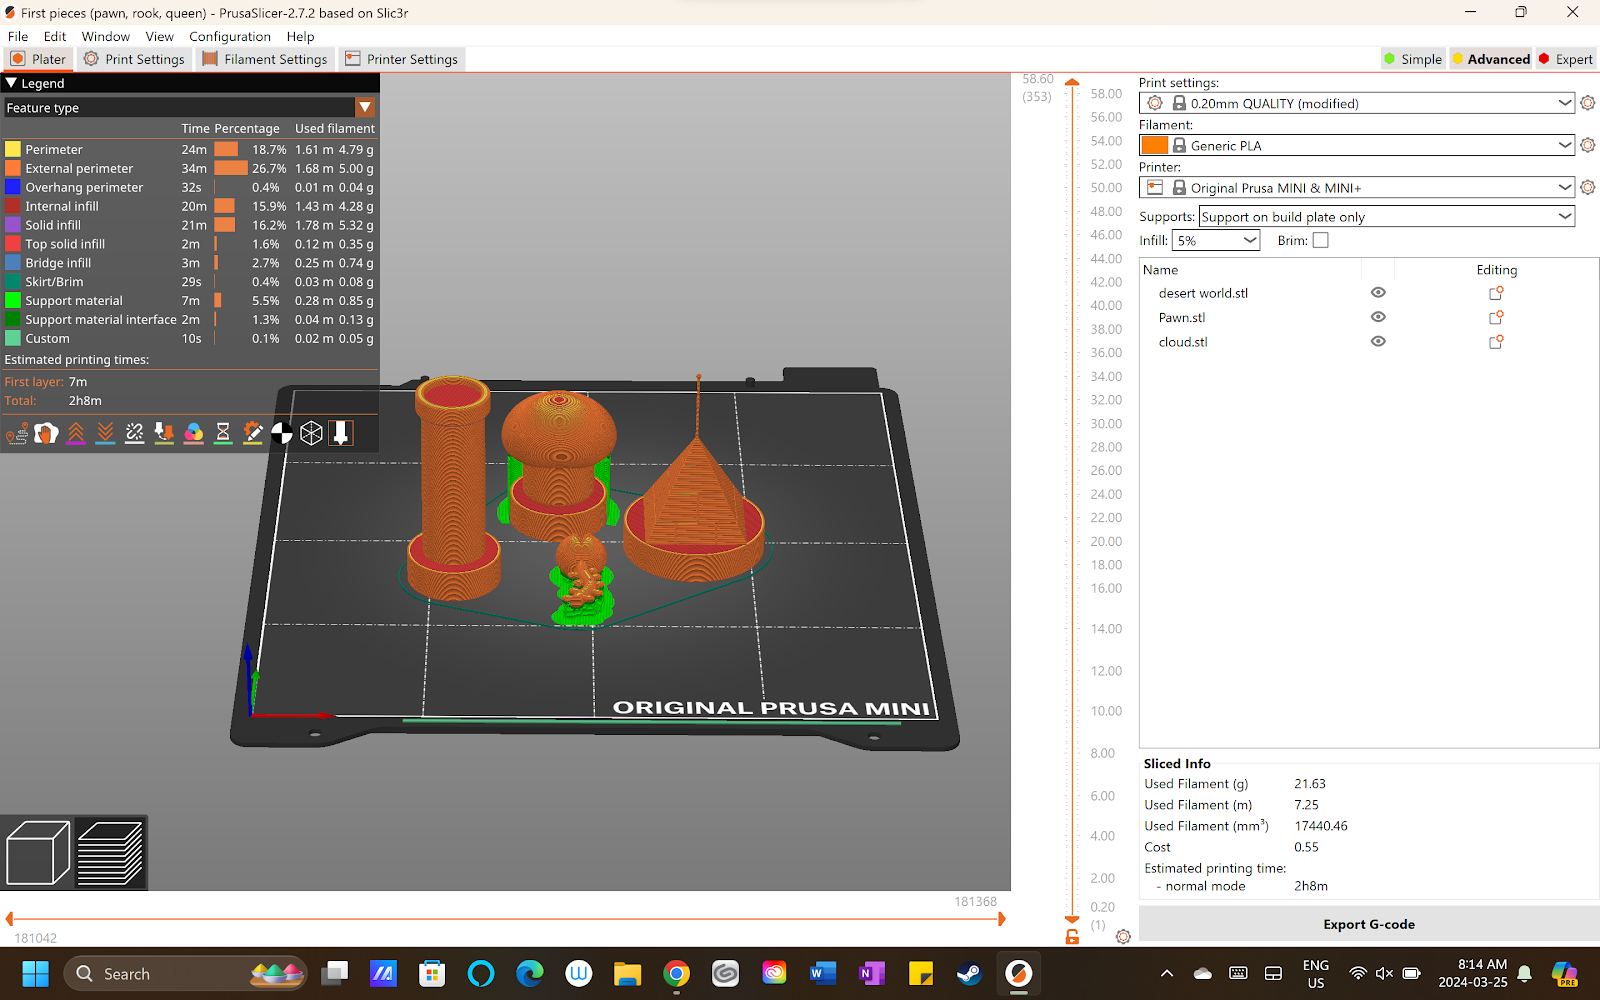
Print 2:
time estimate and you can see how I oriented some of my stuff. To avoid a bunch of supports, the king had to be turned on his side.


Printing:


Assembly:


Gluing (using acrylic paint):
I honestly just used the paint to see if I could...since acrylic paint dries down to plastic.


Some of the photos here are to show how I used acrylic paint to smooth out some of the texture of the castle since I had to print it horizontally instead of vertically.


And some more texture/holes here as well.


Final Photos:


Notes:
First, the flagpole of the pyramid broke when I fiddled with it and it is so much wider than the other pieces...so I will probably resize it and possibly do a reprint.
For next week, if I have time, I may paint one of the pieces to show what they would look like painted.
Also, I didn't print the wavy parts of the bases 1. because of the trouble in Rhino, and 2. because I had only really made them for the renders and had planned to paint them.

Comments
Post a Comment