3D Printed Design Concepts: Part Two (Modeling the Pieces and Printing the Test)
Files:
Printing the test:
Brought my model into Prusa Slicer - and measured it again to make sure it was the right size.


Then got all the printing times - double checking that all my print settings were correct.

Then went to go book an appointment and literally none were available.

Guess I'll check back later.

Success!
Printing time. The set up was easy. No problems there.


Completed Print:


Modelling:
First I looked at the rough dimensions for chess pieces so that I could decide how big to make mine.

9.5cm translates to 3.7 inches. So I'm good to use these rough dimensions for my pieces and have them still fit on the printer area.
(not that, that was a concern, but still, it's good to check)
Pawn:
Started with the base of the mushroom.

Then made the mushroom cap - I turned those selection points (I think that's what they are called) on, and was able to manipulate it into the right shape.

Rook (castle):
25mm square base (measured in mm)

Then made the flagpole.

Then Rhino crashed.
Well, at least I didn't get too far in.

So I did the same thing.

I made these triangles to cut out of the main pyramid to make the brick texture.

Loft

Arrange and then boolean difference


Then there were the vertical ones...these ones were a total headache. As you can see, they were lined up a bit funny at first.

Then the boolean difference would constantly fail.

But at last, I got some success. What I need to do is make those cutout shapes specific to each section. Just moving them around isn't accurate enough and the program doesn't like that.

(NOTE: I added in a flag for the render, I will probably not print a flag and will just make one out of paper or something. Mostly for time's sake, I don't want to print anything I don't have to).
Knight:
I knew this tree was going to be difficult, but I honestly made more work for myself with this first method I tried.
So I made a base...

Then I made a frame...


Then I used the command surface from network of frames...

There is a bunch of frustration that happened in between these two images that I didn't document because it was literally me doing the same things over and over again...I would try and fix the rails and then make the surfaces and try to join them but certain sections wouldn't join together...it was a whole mess. So I ended up using one of the points that did join together and I filleted it.
Then I tried arranging them because I realized I didn't have enough points.

Tried to do some cutting to clean it up a bit.

But that didn't work and I didn't like the way it looked, so I tried something else.
I started with a sphere, and much like a bunch of the other models, I just used the control points to make it into the appropriate shape.


Then I arranged them to the proper number of points...

Then layered three of them on top of one another, each tear being smaller than the one underneath. Plus, I added a cone to finish off the top.

Bishop:
Started by making the base of the tree, which is just a bunch of lofted circles.

Similar to the mushroom cap, the leafy portion of this tree is just a manipulated sphere.

I added a second branch, similar to how it is modelled in the game, but I'm not sure if I like it or not. I'll probably ditch it.

(NOTE: I did indeed get rid of the branch.)
Queen:
Base pipe construction

Filleting the edges.

Then I made the stem of the plant that comes out of the pipe. Just drew a line and piped it.

For the "head," I made a sphere and then cut it in half.

Arranged the head to look like an open mouth...

At first, I tried piping the lips directly to the unjoined, uncapped half spheres...

Then I realized I was being dumb and capped the two halves so I could boolean union them together.

Then I piped the lips on the edges.

And added a sphere so the ends would look less awkward.

Adjusted the stem of the plant

(NOTE: I also added in some of the leaves for the renders, I am unsure if I will print them or not.)
King:
Slightly bigger pipe than the queen. Added the two bands.

Then I started work on the spikes. I gave mine eight per band because it made the most sense with the next part. But as you can see from the reference, that number is actually very different.


Starting on the roof, I made an octagon and then filleted the edges and piped it to get that white border.

More lofting, this time with octagons, to get the dome of the roof.

More spikes and number of spikes are once again simplified.

Then all around the dome.

For making the brick texture:
First, I unroll the main cyclinder

Draw out a brick texture

Make the bricks (just surfaces at this point) and get their proper spacing.

Extrude and cap to make the texture.

First attempt at the flow-along surface, you really do need to click in the right spots.

Then I got it right.

Then I realized that I should probably fillet the edges of the brick to make sure it can print without support. If I decide to keep the brick texture. As it might drastically increase my printing time and that wouldn't be good.

And done.

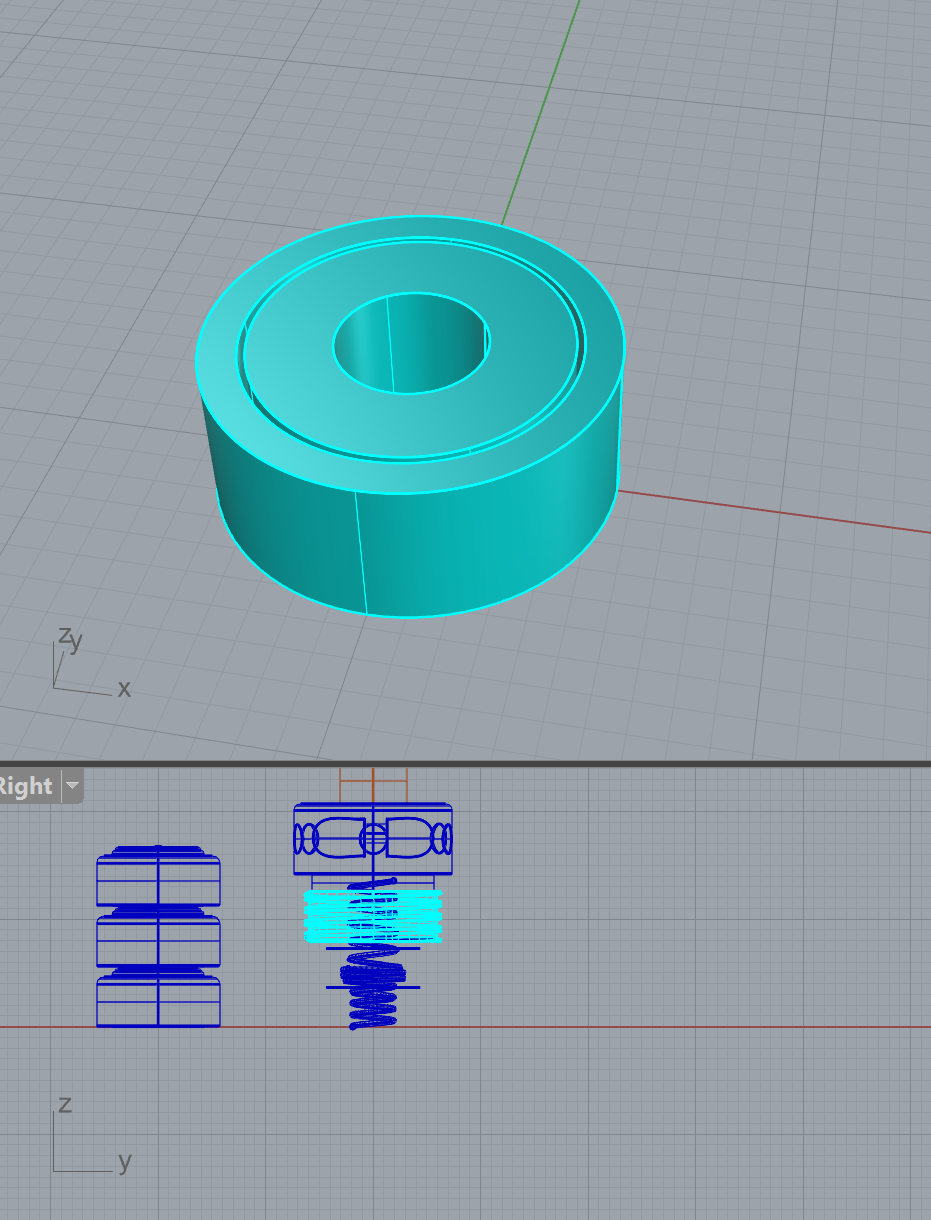
Bases:
Base base (that will be customized for a few different pieces):

Adding the rim so I can do some fancy stuff later.

Make the border shape - the red squiggly line


Extrude it (and cap it) - then fillet the edge so that when printing, I hopefully don't need supports.

(Finished version in next section)
Iterations:
A first basic model of each piece - untextured.

Completed models (No bases)


Completed models (done based)

Red set - test render

Green test render (in the correct order - I accidentally made them in the wrong order initially)


Comments
Post a Comment